
Showing posts with label printmaking. Show all posts
Showing posts with label printmaking. Show all posts
Monday, 5 September 2016

Thursday, 25 August 2016

Tuesday, 23 August 2016
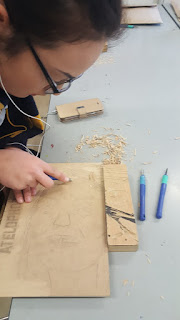
Woodcut Selfies
Beautiful job, just finishing off. Moving onto watercolour and formal drawing techniques next week...




Monday, 4 July 2016
Tuesday 5th July 2016
So now you all need to get a little more creative with your work.
I am away today so have left it to you to figure out the following:
 |
| Link to new Pinterest page for inspiration today |
I am away today so have left it to you to figure out the following:
- Your page of notes from week 6 (before camps went away) from my messy whiteboard notes that we did. YOUR ideas, not mine :-)
- Thumbnail sketches - you should have 4 - 6 ideas that loosely, quickly and efficiently describe how to combine your selfie with words that explain your message, which is preferably one word, but may be more like a quote.
- Use this pinterest board to help inspire and move your ideas forward. Have a really good look and think about what you want to say in your work. search beyond it but within the realms of your topic (so not on trademe Izac and not for makeup tutorials girls and not on gaming sites boys)
- Absolutely stun me with your amazing ideas preferably as a post on your blog. I cannot wait to see what you come up with :-)
Tuesday, 7 June 2016
Whiteboard notes from Week 5:
The notes in pink are not the 'only' things you can do, they are examples that we came up with in class. Please consider this when you are working.
The expectation is that you come up with one page of evidence that shows you have thought through all of this and potentially more (if you want to achieve at a higher curriculum level for example)

Some examples below are from a class last year who worked on a similar unit of work:

Kita - 2015

Kirsty 2015
One student writes lots the other does not. both have good ideas, one is able to be assessed a little more easily. Both are valid and very good.
The expectation is that you come up with one page of evidence that shows you have thought through all of this and potentially more (if you want to achieve at a higher curriculum level for example)

Some examples below are from a class last year who worked on a similar unit of work:

Kita - 2015

Kirsty 2015
One student writes lots the other does not. both have good ideas, one is able to be assessed a little more easily. Both are valid and very good.
Tuesday, 24 May 2016
German Expressionism
By now we all should have seen this. It is here fi you want to go through it again, or you have deleted/lost the email link I sent you...
The research pages are looking really good and we are working towards some printmaking with mono-prints and possibly drypoint etching :-)
The research pages are looking really good and we are working towards some printmaking with mono-prints and possibly drypoint etching :-)
Friday, 29 April 2016
Thursday, 14 April 2016
Printing Process
Design:

You should have a page that started something like this. We began with a leaf and moved into stylising it based on visual knowledge of two movements of Art:
1) K_ _ _ _ _ _ _ _ _
2) A _ _ N _ _ _ _ _ _
Transferring your design onto your wood:


You knew the size of your wood towards the end of that stylisation process. Howe you fit that design onto the wood is up to you. But do have a think about how the space behind the form you have designed can work with your design. Draw you lines thickly and clearly.
Cutting your block:


1) Fingers are never in front of the blade!
2) What you cut is going to print white, what you leave behind is going to print coloured.
3) There is always a way to fix your mistakes, don't biff your block without a decent discussion with your teacher first.
4) Classroom Tikanga absolutely demands you clean up your wood chips so that the cleaner does not have to spend more time in our room than he is paid for.
Printing your block:
You need a roller, perspex plate to roll ink onto, newspaper, paper to print onto and a spoon!
And patience...

Print off at least 5 copies, as you are a printmaker here, not a painter. These are not one-off Art works, they are able to be mass produced for everyone. And Christmas presents that you make are always better.

You should have a page that started something like this. We began with a leaf and moved into stylising it based on visual knowledge of two movements of Art:
1) K_ _ _ _ _ _ _ _ _
2) A _ _ N _ _ _ _ _ _
Transferring your design onto your wood:


You knew the size of your wood towards the end of that stylisation process. Howe you fit that design onto the wood is up to you. But do have a think about how the space behind the form you have designed can work with your design. Draw you lines thickly and clearly.
Cutting your block:


1) Fingers are never in front of the blade!
2) What you cut is going to print white, what you leave behind is going to print coloured.
3) There is always a way to fix your mistakes, don't biff your block without a decent discussion with your teacher first.
4) Classroom Tikanga absolutely demands you clean up your wood chips so that the cleaner does not have to spend more time in our room than he is paid for.
Printing your block:
You need a roller, perspex plate to roll ink onto, newspaper, paper to print onto and a spoon!
And patience...

Print off at least 5 copies, as you are a printmaker here, not a painter. These are not one-off Art works, they are able to be mass produced for everyone. And Christmas presents that you make are always better.
Thursday, 7 April 2016


Sunday, 20 March 2016
Back to Stylisation
This is a process, but it is not a linear, step-by-step one. There is room for all sorts of creative influence to arrive and be a part of the journey, as your head thinks things out with a pencil.
Last lesson, we looked at this process with an 'exemplar'. That is an example work that shows you a way of thinking something out visually. It is not the only way of making the art work, it is meant to help you get comfortable with trying out a new process by seeing it done by someone else.

This exemplar is the one we referred to on Friday. It is on the google site as well and you should be able to access it whenever you like.
Key things to remember before we start on Monday:
Your outcomes for the end of Monday's lesson are:
Last lesson, we looked at this process with an 'exemplar'. That is an example work that shows you a way of thinking something out visually. It is not the only way of making the art work, it is meant to help you get comfortable with trying out a new process by seeing it done by someone else.

This exemplar is the one we referred to on Friday. It is on the google site as well and you should be able to access it whenever you like.
Key things to remember before we start on Monday:
- This is not the only outcome
- I have referenced both Art styles studied; Art Nouveau, Kowhaiwhai
- The original koru come from the veins of the leaves being made prominent
- You use your leaf form to create your own stylised version
- One drawing is NOT enough work. It is a start. That is like writing one sentence and calling it an essay.
Your outcomes for the end of Monday's lesson are:
- A full page of ideas (plural).
- Excellent drawing skills, you all can, so you may as well show off.
- Something within that wonderful page that can be used as a print next week.
Subscribe to:
Posts (Atom)